Plan 9 Installation
[UPD: ]Basic installation and configuration of the file server and authorization server
Due to its rather unique architecture and the approaches used, the installation of Plan 9 [9front fork] can raise a lot of questions even from an experienced system administrator. Most of this article will be a revised information from the help on the project’s website1. The help does not reveal some subtle points, so I will try to supplement it with my experience. In the process, I will use a KVM virtual machine.
Preparation
– Don’t grab it right away. Don’t grab him right away, Urry. Find out how it’s operated first. Find out how it’s managed first.
– I didn’t understand, repeat.
– Find out where his button is!
Before you start, you have to answer a few questions:
- What configuration does your local network have?
- What hardware is installed in your machine and is it supported in the OS? [a list of supported hardware is available on the project’s website2]
- What name will the machine and your user have?
If you are having difficulties at this stage, then I advise you to stop and come back later. After you have received the answers to these questions, we can move on.
First, download the appropriate installation ISO system image from the project website3 and create a bootable USB flash drive. If you have chosen to install on a virtual machine for the first attempt [which I advise you], then simply mount the disk image to the VM and start booting. If everything was done correctly, you will see the boot process.
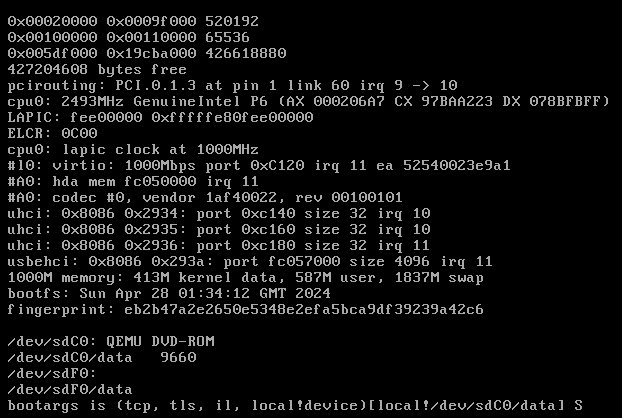
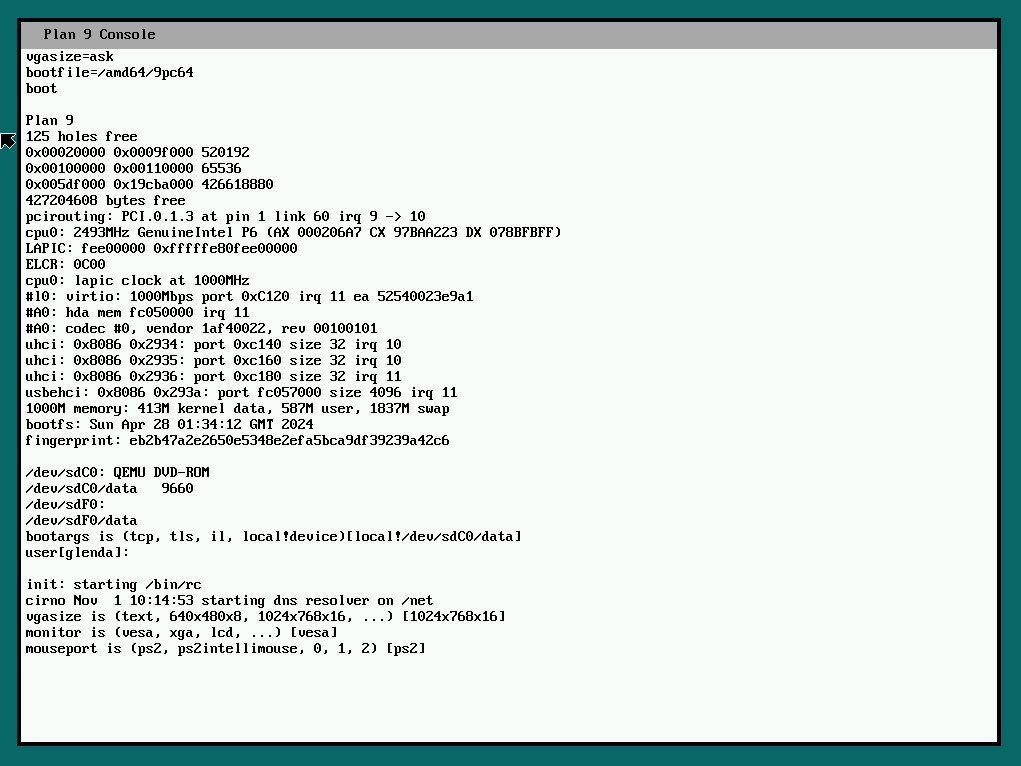
Also, during the first boot, you will be asked several questions. In most cases, you can leave the default values [usually indicated in square brackets], if they are available.
user
user[glenda]:
The suggested default user is glenda.
The system will be started on this machine under this user.
Such a user in the context of Plan 9 is called host owner.
The concept of a root user has been abolished due to security concerns.
The host owner has high permissions on a specific machine, but is limited in access to other users files.
For the first installation, it is better not to change it.
Just hit Enter.
vgasize, monitor, mouseport
The following questions will ask for information about the display and mouse:
vgasize is (text, 640x480x8, 1024x768x16, ...) [1024x768x16]
monitor is (vesa, xga, lcd, ...) [vesa]
mouseport is (ps2, ps2intellimouse, 0, 1, 2) [ps2]
Based on the responses, the environment variables $vgasize, $monitor and $mouseport will be set.
These values will also be written to the plan9.ini file, from which they will be used for follow bootings.
monitor- any value other thanvesawill skip VESA BIOS emulation and an attempt will be made to use the native VGA driver for the video card. The list of displays and video cards supported by the system can be found in the file/lib/vgadb. Additional information can be found on the help pages vga(3), vga(8) and vgadb(6).vgasize- used to store the resolution and bit depth of the display. Here you can specify any value supported by your display.mouseport- the default valueps2should be suitable in most cases. When installing on a laptop or using a mouse with a scroll wheel, you may need to set it to `ps2intellimouse'.
After the booting is complete, you can change the set values in the plan9.ini file.
Example of the content of plan9.ini:
monitor=vesa
vgasize=1024x768x16
mouseport=ps2intellimouse
Startup
After answering the questions, the boot process will try to launch the standard graphics multiplexer rio, welcoming you with a gray desktop with a running load monitor stats and a window with a rc shell.

Keep in mind that if the user has been changed, then you will just see a gray screen. Initialization ready only for the glenda user. In all other cases, the system remains clean.
A little bit about control
A three-button mouse is used to control the multiplexer rio.
- Left Mouse Button - focus indication and highlighting, nothing special;
- Middle Mouse Button - context menu, which will vary for different applications;
- Right Mouse Button - rio menu, allows you to create, edit and delete windows.
Applications run in windows rio. But the most interesting thing is that in the rio window can be launched … rio. And more. And more.
When working with a flash drive, this may be enough for a first acquaintance. The system will save its state as a regular live image of any other OS. So you can move on to the next articles in the cycle.
If you have sufficiently explored the live image of Plan 9 and feel that you are ready to build a full-fledged computing network [in the context of Plan 9, the term grid is used], then we continue.
Installing the basic system
The installation is performed by the rc script /rc/bin/inst.
To start the installation, run the inst/start command in the terminal.
term% inst/start
Follow the instructions to complete the installation, selecting the default values if necessary.
Each step can be repeated by entering its name in the prompt.

Now let’s move on to the installation steps.
configfs
The cwfs64x file system uses permanent and temporary storage on different partitions.
The hjfs file system is more homogeneous, but works slower.
If you are installing to a disk of less than 12 GiB, you should choose hjfs.
In this example we will press Enter to accept cwfs64x as the default.
You can install the following types of systems:
    cwfs64x     the cached-worm file server
    hjfs        the new 9front file server (experimental!)
File system (cwfs64x, hjfs)[cwfs64x]:

partdisk
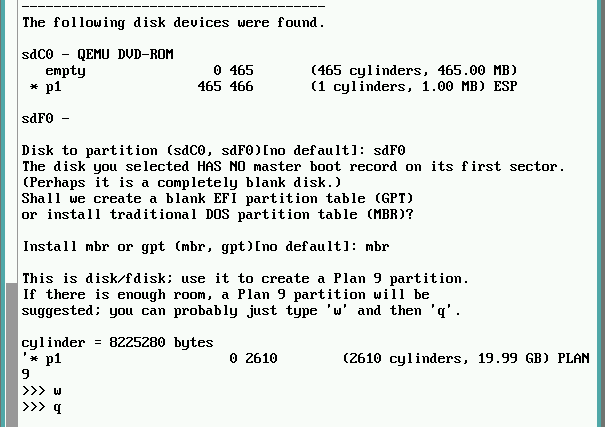
At this step, we need to create partitions. The installation script will tell you which disks it was able to detect.
Select the one that is not an optical disc emulation and press Enter.
The following disk devices were found.

sdC0 - QEMU DVD-ROM
    empty                  0 3916        (3916 cylinders, 29.99 GB)
  * p1

sdF0 -

Disk to partition (sdC0, sdD0)[no default]: sdF0
The disk you selected HAS NO master boot record on its first sector.
(Perhaps it is a completely blank disk.)
Shall we create a blank EFI partition table (GPT)
or install traditional DOS partition table (MBR)?
Our disk is empty, so let’s create a fresh MBR table.
Install mbr or gpt (mbr, gpt)[no default]: mbr

This is disk/fdisk; use it to create a Plan 9 partition.
If there is enough room, a Plan 9 partition will be
suggested; you can probably just type ’w’ and then ’q’.

cylinder = 8225280 bytes
For this example we will use the entire disk. Accept the defaults.
>>> w
>>> q
prepdisk
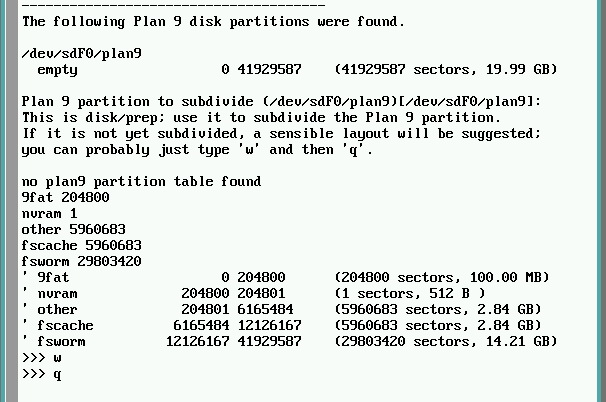
Due to the peculiarities of CWFS, we need to divide of the partition into subpartitions.
The following Plan 9 disk partitions were found.

/dev/sdF0/plan9
  empty                  0 62910477    (62910477 sectors, 29.99 GB)

Plan 9 partition to subdivide (/dev/sdC0/plan9)[no default]:
Use the Plan 9 partition created in the previous step. Type /dev/sdC0/plan9 and hit enter.
This is disk/prep; use it to subdivide the Plan 9 partition.
If it is not yet subdivided, a sensible layout will be suggested;
you can probably just type `w` and then `q`.

no plan9 partition table found
9fat 204800
nvram 1
other 8957953
fscache 8957953
fsworm 44789770
>>>
Again, accept the defaults.
>>> w
>>> q
mountfs
Now that the subpartitions are created, we specify how to mount them and format them.
If the previous steps went without problems, then the installation script will detect the partitions we created on its own.
Just press Enter on each of the questions.
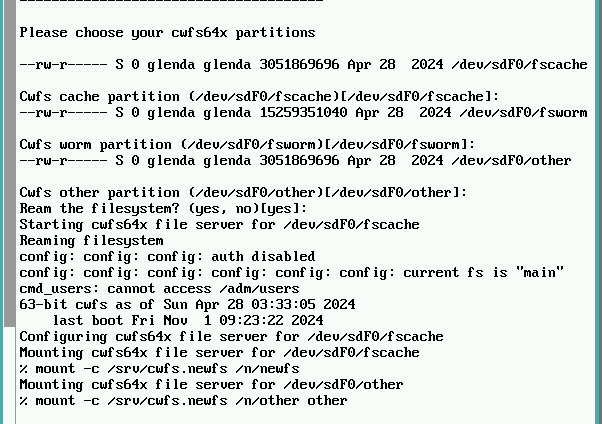
The please choose your cwfs64x partitions

--rw-r----- S 0 glenda glenda 4586471936 Jul  4 13:28 /dev/sdC0/fscache

Cwfs cache partition (/dev/sdC0/fscache)[/dev/sdC0/fscache]:
--rw-r----- S 0 glenda glenda 22932362240 Jul  4 13:28 /dev/sdC0/fsworm

Cwfs worm partition (/dev/sdC0/fsworm)[/dev/sdC0/fsworm]:
--rw-r----- S 0 glenda glenda 4586471936 Jul  4 13:28 /dev/sdC0/other

Cwfs other partition (/dev/sdC0/other)[/dev/sdC0/other]:
Since this is a fresh install, we choose yes to ream (format) the file system:
Since this is a fresh install, we choose yes to ream (format) the file system:
Ream the file system? (yes, no)[no]: yes
Starting cwfs64x file server for /dev/sdC0/fscache
Reaming file system
bad nvram key
bad authentication id
bad authentication domain
nvrcheck: can’t read nvram
config: config: config: auth is now disabled
config: config: config: config: config: config: current fs is "main"
cmd_users: cannot access /adm/users
63-bit cwfs as of Wed Jul  4 00:59:30 2012
    last boot Tue Jul 17 13:34:57 2012
Configuering cwfs64x file server for /dev/sdC0/fscache
Mounting cwfs64x file server for /dev/sdC0/fscache
% mount -c /srv/cwfs /n/newfs
Mounting cwfs64x file server for /dev/sdC0/other
% mount -c /srv/cwfs /n/other other
confignet
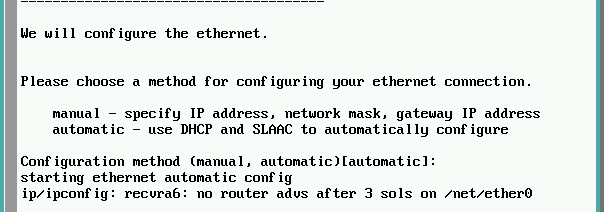
We will configure the ethernet.

Please choose a method for configuring your ethernet connection.

    manual - specify IP address, network mask, gateway IP address
    automatic - use DHCP and SLAAC to automatically configure

Configuration method (manual, automatic)[automatic]:
automatic
In this example, I will focus on the automatic configuration, since I have DHCP configured. If you will also use DHCP, then do not forget to reserve the address on the server.
Hit Enter to move on to the next task.
manual
Manual configuration is not difficult. You just need to specify the IP address, network mask, gateway and DNS server.
Configuration method (manual, automatic)[automatic]: manual
ip address [no default]: 192.168.2.10
network mask [no default]: 255.255.255.0
gateway address [no default]: 192.168.2.1
dns server [192.168.2.1]:
starting ethernet manual config
mountdist
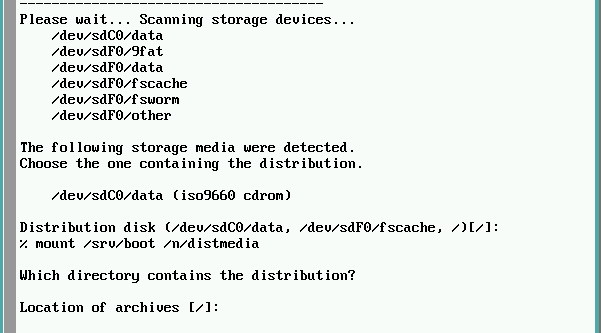
We will tell the installation script where to look for the files to install.
Please wait... Scanning storage devices...
    /dev/sdC0/9fat
    /dev/sdC0/data
    /dev/sdC0/fscache
    /dev/sdC0/fsworm
    /dev/sdC0/other
    /dev/sdD0/data

The following storage media were detected.
Choose the one containing the distribution.

    /dev/sdD0/data (iso9660 cdrom)

Distribution disk (/dev/sdD0/data, /dev/sdC0/fscache, /)[/]:
The CD-ROM is already mounted at /, so type / and hit Enter.
% mount /srv/boot /n/distmedia

Which directory contains the distribution?

Location of archives [/]:
And again, the root directory of the CD-ROM is already mounted at /, so hit Enter to choose the default.
copydist
At this step, the system distribution files will be copied from the install media to the hard disk. Currently, there is no progress meter. Disk activity may be verified by inspecting the stats(8) window. Task may exceed one hour in duration depending on the speed of your disk.
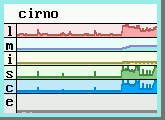
Eventually, you should see the following:

This indicates that the system files have completed copying to the install target.
ndbsetup
Let’s give our host a name. By default, cirno will be assigned.
Setup network configuration

sysname [cirno]: test-fs

tzsetup
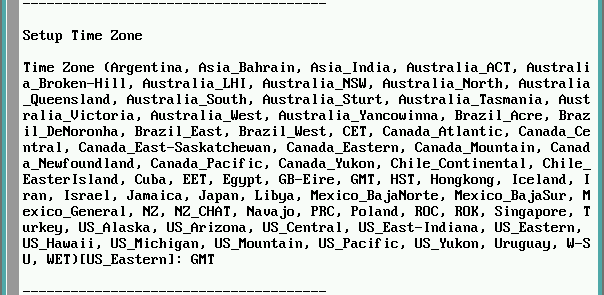
Setup Time Zone

Time Zone (Argentina, Australia_ACT, Australia_Broken-Hill,
Australia_LHI, Australia_NSW, Australia_North, Australia_Queensland,
Australia_South, Australia_Sturt, Australia_Tasmania,
Australia_Victoria, Australia_West, Australia_Yancowinna, Brazil_Acre,
Brazil_DeNoronha, Brazil_East, Brazil_West, CET, Canada_Atlantic,
Canada_Central, Canada_East-Saskatchewan, Canada_Eastern,
Canada_Mountain, Canada_Newfoundland, Canada_Pacific, Canada_Yukon,
Chile_Continental, Chile_EasterIsland, Cuba, EET, Egypt, GB-Eire, GMT,
HST, Hongkong, Iceland, Iran, Israel, Jamaica, Japan, Libya,
Mexico_BajaNorte, Mexico_BajaSur, Mexico_General, NZ, NZ_CHAT, Navajo,
PRC, Poland, ROC, ROK, Singapore, Turkey, US_Alaska, US_Arizona,
US_Central, US_East-Indiana, US_Eastern, US_Hawaii, US_Michigan,
US_Mountain, US_Pacific, US_Yukon, W-SU, WET)[US_Eastern]: GMT
Type your chosen time zone and hit Enter.
bootsetup
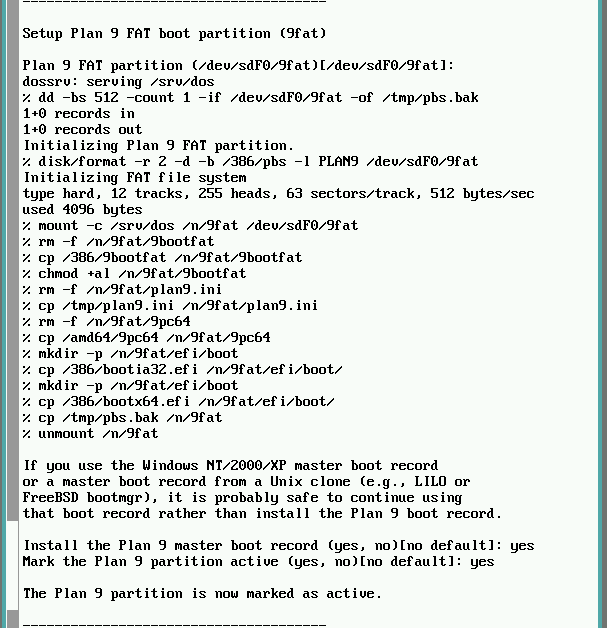
Setup Plan 9 FAT boot partition (9fat)

Plan 9 FAT partition (/dev/sdC0/9fat)[/dev/sdC0/9fat]:
Hit enter to accept the default.
Any environment variables entered at the > prompt during boot, as well as settings configured during install will now be written to /n/9fat/plan9.ini and the kernel will be copied to the 9fat partition.
dossrv: serving /srv/dos
Initializing Plan 9 FAT partition.

% disk/format -r 2 -d -b /386/pbs /dev/sdC0/9fat
Initializing FAT file system
type hard, 12 tracks, 255 heads, 63 sectors/track, 512 bytes/sec
used 4096 bytes
% mount -c /srv/dos /n/9fat /dev/sdC0/9fat
% rm -f /n/9fat/9bootfat /n/9fat/plan9.ini /n/9fat/9pc
% cp /n/newfs/386/9bootfat /n/9fat/9bootfat
% chmod +al /n/9fat/9bootfat
% cp /tmp/plan9.ini /n/9fat/plan9.ini
% cp /n/newfs/386/9pc /n/9fat/9pc

If you use the Windows NT/2000/XP master boot record
or a master boot record from a Unix clone (e.g., LILO or
FreeBSD bootmgr), it is probably safe to continue using
that boot record rather than install the Plan 9 boot record.
Since we are not installing on a disk with a pre-existing Windows installation, we choose to install the Plan 9 master boot record and mark the partition active.
Install the Plan 9 master boot record (yes, no)[no default]: yes
Mark the Plan 9 partition active (yes, no)[no default]: yes

The Plan 9 partition is now marked as active.
finish
The last step will disable the CD image and shut down.
We confirm by pressing the Enter key to restart the computer.
Your first installation of 9front is complete.
Congratulations!
Auth and File Server Setup
Based on follow example - youtube.
This step will be a little tricky to follow. But only need to be done once to get the File server officially running. There are a lot of moving parts and they need to be done correctly for everything to work. As this will be a combination of Authorization and File server we will need to set up both those systems.
Authorization will handle checking the passwords and the file system will make sure the users have access to the correct files. First thing that needs to be done is to set a host owner for the system. The Plan 9 developers did away with a root user because it was had obvious security issues. Instead each system has a designated host owner. The host owner has ultimate power over any processes runnung on the system it owns. So the host owner can kill processes and access pretty much all the hardware.
In the case of the file server the host owner does not have ultimate acceess to the files normally. Only in the special case where the host owner boots the console mode with authorization disabled.
Setup NVRAM
We’ve noted the NVRAM partition before this is a small piece of storage called Non-Volatile RAM for historical reasons and it holds a password token for the host owner.
This allows the system to boot with authorization without needing to enter a password at the boot prompt.
To be sure the system uses it i will add it to the plan9.ini.
Some systems will do this automatically but i just want to be sure.
So lets mount the 9fat partition.
% 9fs 9fat
% sam /n/9fat/plan9.ini
Here we can specify exactly where to get the NVRAM partition from and this can also be set as a file.
bootfile=9pc64
nvram=/dev/sdF0/nvram
bootargs=local!/dev/sdF0/fscache
mouseport=ps2
monitor=vesa
vgasize=1024x768x16

tiltscreen=none
And now we’ll reboot the system so that takes effect.
% fshalt -r
Write to NVRAM
Now we have rebooted the system with the NVRAM partition specified and the next step is to write to it.
authid- will be the host owner which will be glenda.authdom- in this case this asking for a domain name. If you use one just specify it. If not - put something as stub.secstore keyis used for another authorization system and i’m just going to be skipping it for now. HitEnterand leave it blank.password- password for glenda user.
% auth/wrkey
authid: glenda
authdom: testdom
secstore key:
password:
That it.
Add users to auth
The next step is to add glenda to the authorization system and we’ll also be adding a regular user to. So first we need to make sure we have access to the keys.
% auth/keyfs
So we’ll do one for glenda here:
Password- enter the same password;Confirm password- and again;assign new Inferno/POP secret? [y/n]: n- nevermind for now, just set to no;Expiration date (YYYYMMDD or never)[never]:won’t bother with an expiration date, set to never;Post id:,User's full name:,Department #:,User's email address:,Sponsor's email address:- these are if you have like an actual office full of people.
% auth/changeuser glenda
Password:
Confirm password:
assign new Inferno/POP secret? [y/n]: n
Expiration date (YYYYMMDD or never)[never]:
Post id:
User's full name:
Department #:
User's email address:
Sponsor's email address:
user glenda installed for Plan 9
There we go. glenda is now added as a user. And i’ll add just a plain regular user testuser. Give them a password and basically the same options.
% auth/changeuser testuser
Password:
Confirm password:
assign new Inferno/POP secret? [y/n]: n
Expiration date (YYYYMMDD or never)[never]:
Post id:
User's full name:
Department #:
User's email address:
Sponsor's email address:
user testuser installed for Plan 9
Add users to file system
The next step is to add our new testuser to the file system. So glenda automatically gets entered as one of the users on the file system when you do the basic install. And now we need to add the testuser so that they can also own files. To do that we need send commands into the file system’s command server.
% echo newuser testuser >>/srv/cwfs.cmd
All right, so now the new user testuser has been added to the CWFS.
Set up network database
The next step is to edit the network database file to designate this system as the authentication and file server.
This file located in /lib/ndb/local.
Down near the bottom here we have an example that we can use.
# example: adjust to fit your network
#auth=cirno authdom=9front
#ipnet=9front ip=192.168.0.0 ipmask=255.255.255.0
#	ipgw=192.168.0.1
#	dns=192.168.0.1
#	auth=cirno
#	dnsdom=9front
#	cpu=cirno
#	smtp=cirno
So we just need to make own version of this:
auth=test-fs authdom=testdom
ipnet=testdom ip=192.168.2.0 ipmask=255.255.255.0
	ipgw=192.168.2.1
	dns=192.168.2.1
	auth=test-fs
	fs=test-fs
	dnsdom=testdom
Edit plan9.ini
Now we need add another edit to plan9.ini.
Because of quircks with CWFS we need to do two edits.
- The first is to make copy of
plan9.inito boot the system up in configure mode to make sure that authorization to the file system is working; - And we also need a final
plan9.iniconfiguration so the server boots up normally without any need for interaction.
So let’s mount the 9fat again and make a copy of current plan9.ini and another one which we’ll use later.
9fs 9fat
cp /n/9fat/plan9.ini /n/9fat/plan9.bak.ini
cp /n/9fat/plan9.ini /n/9fat/plan9.new.ini
For existing one the first thing we need to do is change this from the default which is a terminal to a CPU server.
And then to the boot arguments we’ll add a -c to drive option for the file system and this will put it into configure mode.
bootfile=9pc64
nvram=/dev/sdF0/nvram
service=cpu
bootargs=local!/dev/sdF0/fscache -c
mouseport=ps2
monitor=vesa
vgasize=1024x768x16

tiltscreen=none
For the new one we’ll add an option -a tcp!*!564 to drive options.
This will tell the system to be listening on TCP port 564 for commands to mount to the file system.
This will also be a service CPU and we will change the boot args to nobootprompt so it won’t ask for us to hit Enter.
bootfile=9pc64
nvram=/dev/sdF0/nvram
service=cpu
nobootprompt=local!/dev/sdF0/fscache -a tcp!*!564
mouseport=ps2
monitor=vesa
vgasize=1024x768x16

tiltscreen=none
So we writing both file now because once the system reboots the graphical system will be disabled so it won’t load rio and we can’t edit the files with acme or sam. You can use ed, but writing now and using just mv to rename them later is easier.
Boot as a server
So we’ve rebooted the system now and you can see it’s waiting me to enter the default which has the -c.
Hit Enter.
And it has config prompt.
At this point we need to type noauth.
It says auth is disabled.
I’ll type noauth again and auth is now enabled.
Than type end and continues booting the system.
bootargs is (tcp, tls, il, local!device)[local!/dev/sdF0/fscache -c]
config: noauth
auth disabled
config: noauth
auth enabled
config: end
As you can see there’s no rio now. It’s just a prompt.
We’ll mount 9fat partition and so we will move that plan9.ini file with the configuration option.
And then move our final plan9.ini file and reboot the system again.
# 9fs 9fat
# cd /n/9fat/
# mv plan9.ini plan9.config.ini
# mv plan9.new.ini plan9.ini
# fshalt -r
Now you can shut the system down and then take out the monitor, keyboard and mouse and boot it back.
It will happily sit there and wait for file server requests.
Connecting
Now you need a drawterm4 on you main system to connect to file server.
drawterm -h 192.168.2.10 -u testuser -a 192.168.2.10
Enter user password and voila!
Now you connected to FS server.
You also can access you local machine files in /mnt/term.
It’s a pretty usefull, you can write some software on your usual text editor and test it in Plan 9 environment without copying any file.
In subsequent articles, we will focus in more detail on the application of Plan 9, working in the environment and expanding our grid.
-
https://fqa.9front.org/fqa4.html 9front FQA 4 - 9front Installation Guide ↩︎
-
https://fqa.9front.org/fqa3.html 9front FQA 3 - Hardware ↩︎
-
https://9front.org/releases/ 9front releases ↩︎
-
http://git.9front.org/plan9front/drawterm/HEAD/info.html drawterm ↩︎